3D Printing a custom knee brace for a Polio survivor

Overview and problem
A walk-in customer interested in 3D printing technology brought his Polio-surviving father in for a design consultation with the question...
“Could the custom nature of 3D printing help my father walk?”
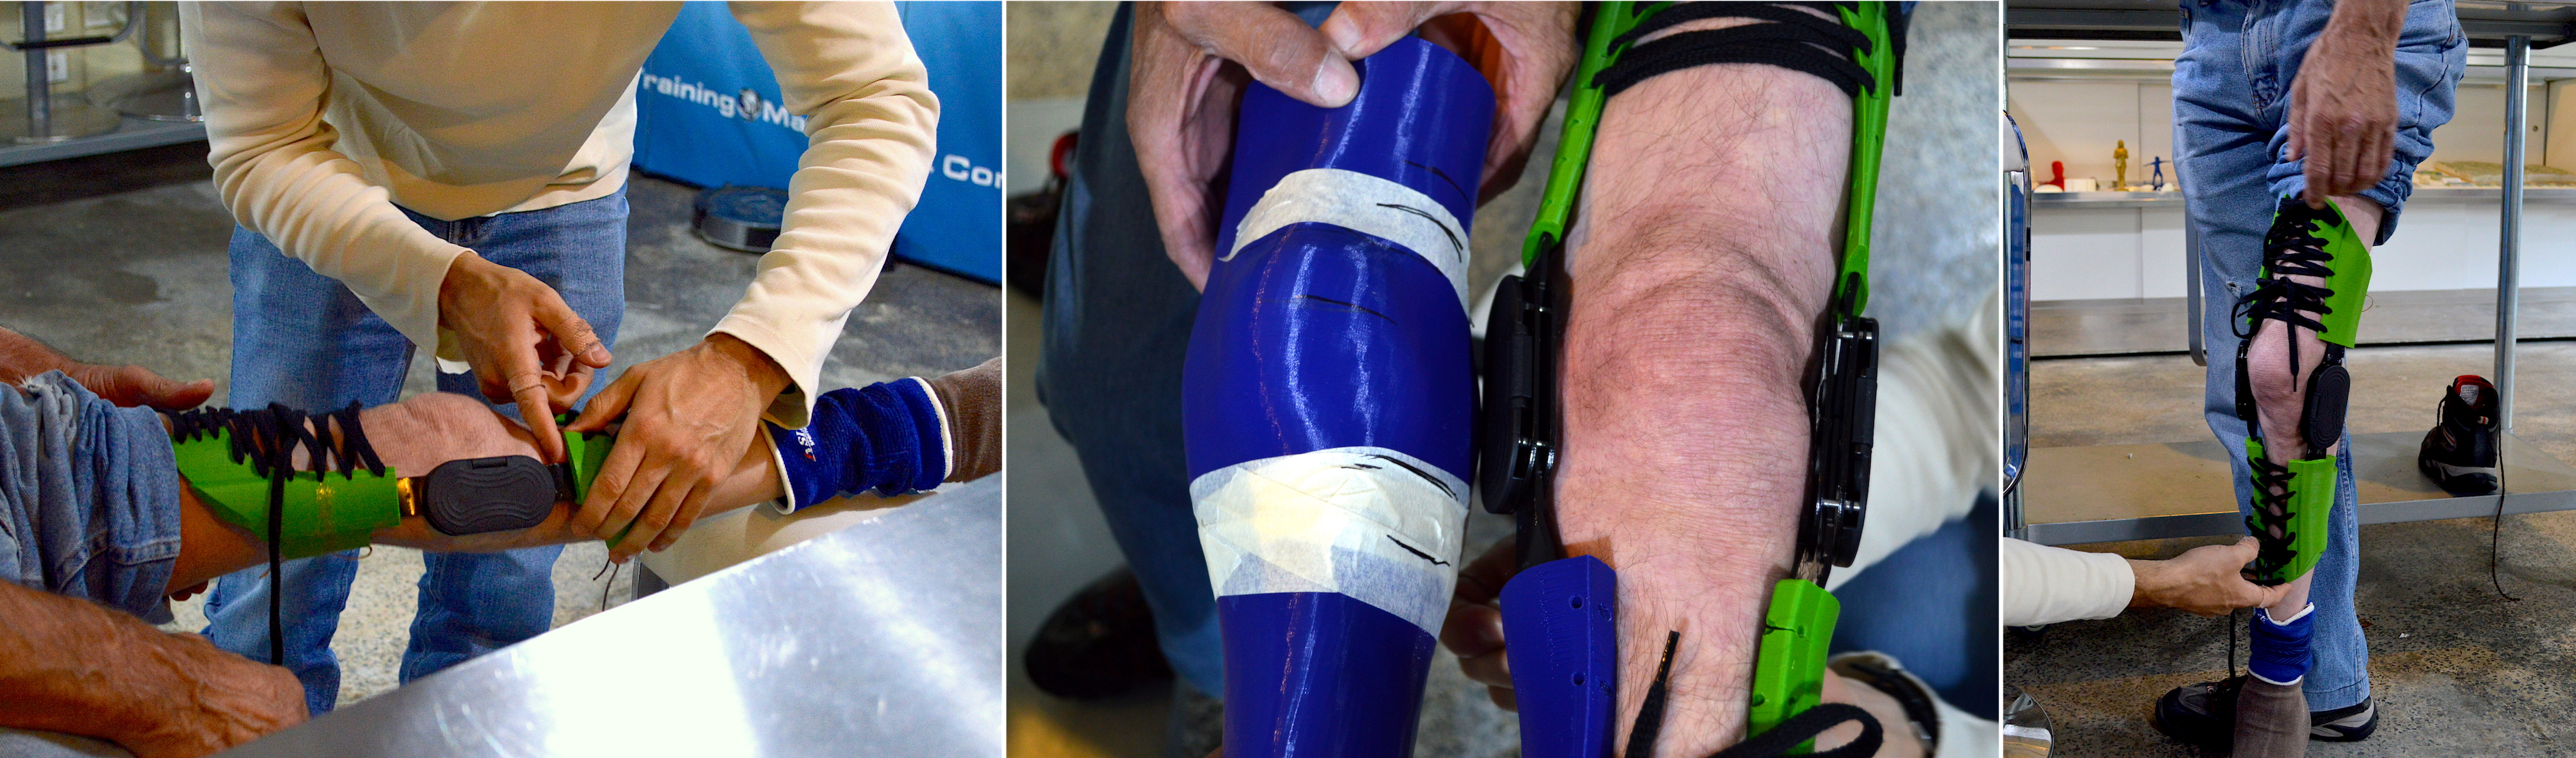
Due to the effects of the disease, on every step the father took, his knee would hyperextend and cause him repeated pain. The family had tried numerous compresses, braces, hinges, and walking aids over the years but due to the muscular atrophy of his left calf, these options never fit right and affected his walking so he had been discarding them in preference of discomfort.
As the Industrial designer and 3D Printer technician in the studio of 2014, I had the pleasure of working with this family to create a custom solution.
Scope and constraints
Due to cost, the family wanted to create a product that was not going to break the bank, and due to the number of prototypes estimated for the project, it was decided that a standard extrusion printer (FDM) would be used for time and material cost. While reducing cost, this method would impact the final strength of the product, however factors such as material, infill percentage, and alignment of print could be used to compensate this.
Another major factor was additional parts. The family wanted to use off-the shelf hinges commonly used in knee imobilisers as pictured below from Spectrum Medical.
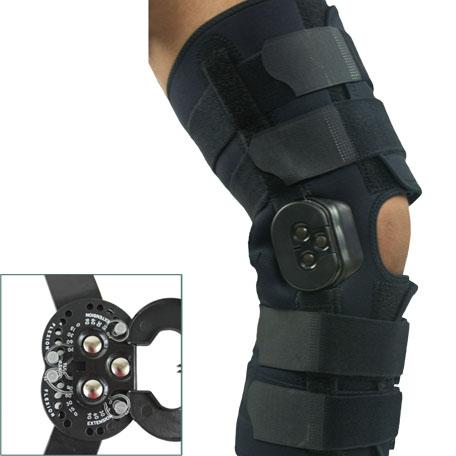
The client provided a hinge for me to use with full disclosure to strip it for parts as required.
Process
Proposal, 3D scanning, and sketches
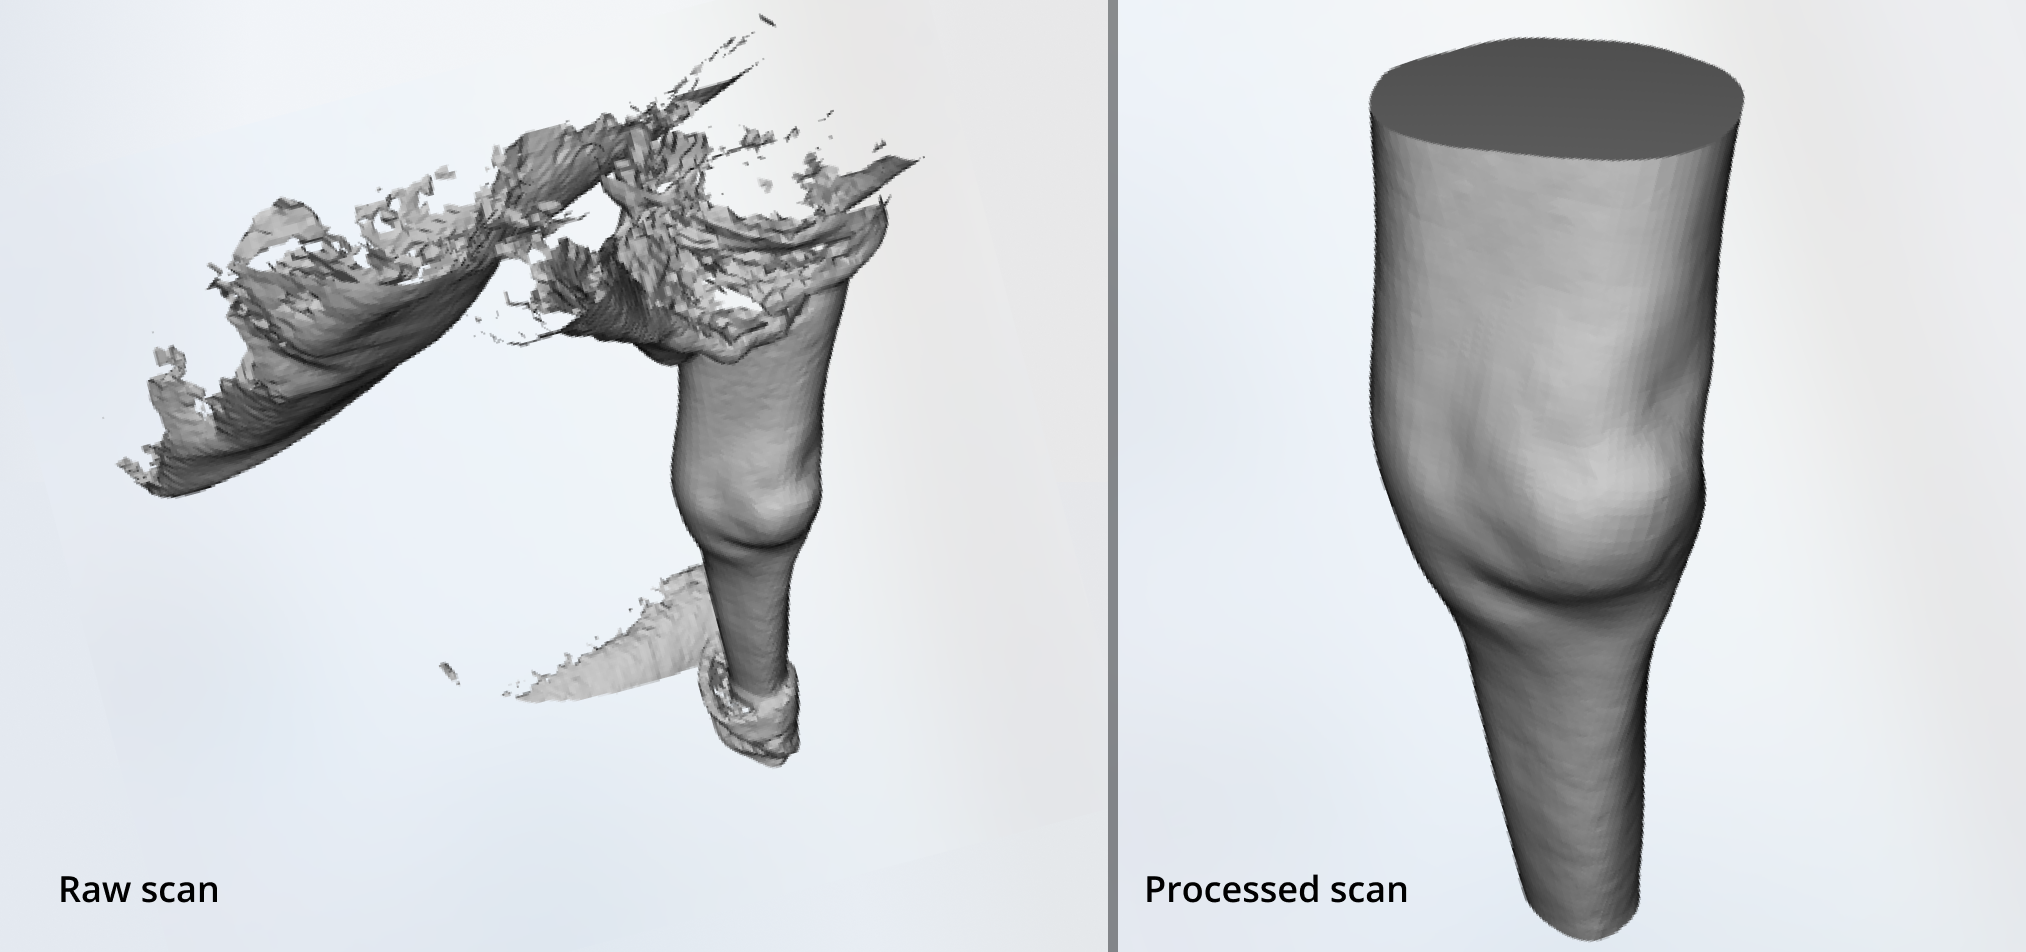
After discussion with the client a proposal was written up and agreed upon with the client before proceeding. From there, the first step was to scan the father’s leg so a custom fit could be created without his father repeatedly needing to physically come in for fittings, especially as mobility was of concern.
This scanning process involved an infrared scanner to map the surface of his leg while he was in the studio.
This file was then cleaned and prepared as a life-size print in two parts (to fit the parameters of the available printer) in the software, Materialise Magics.
To understand my parameters, I personally trialled and measured the provided hinge, then took to paper to visualise how I would manipulate the part to slot into the expected piece.
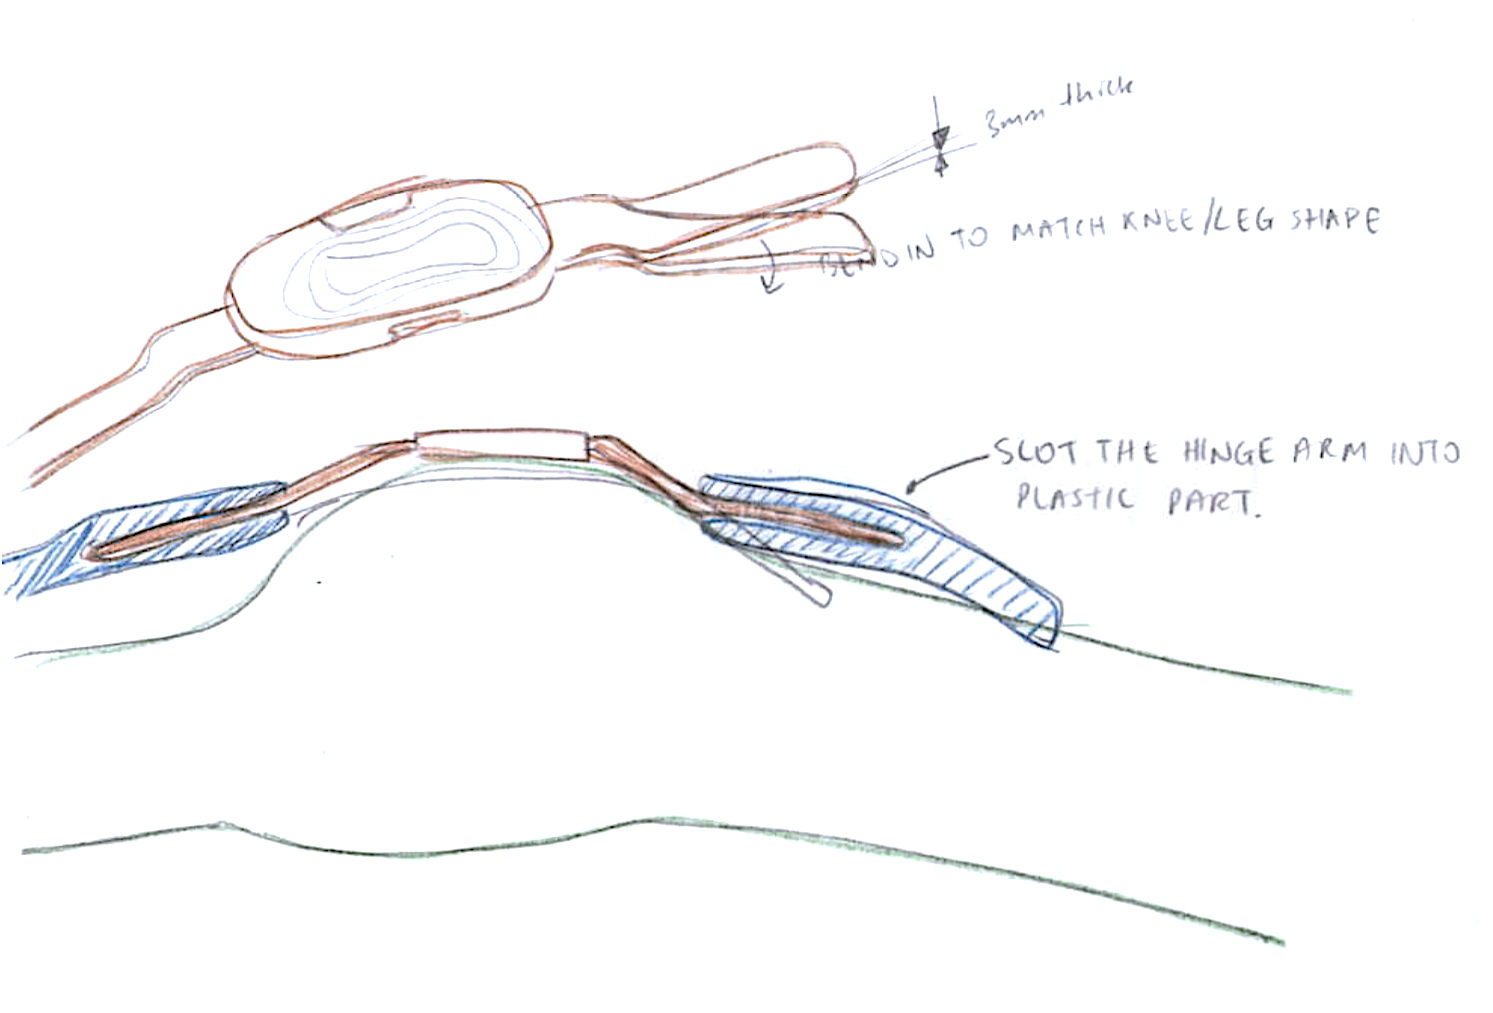
From here, some preliminary aesthetics were considered, mostly exploring shapes that would allow for strength whilst maintaining minimal contact with the actual leg. Due to the constant movement required when walking and the rigidity of the hinge, contact points between skin and a rigid surface were likely to cause friction or pinch points, even if cushioning were added.
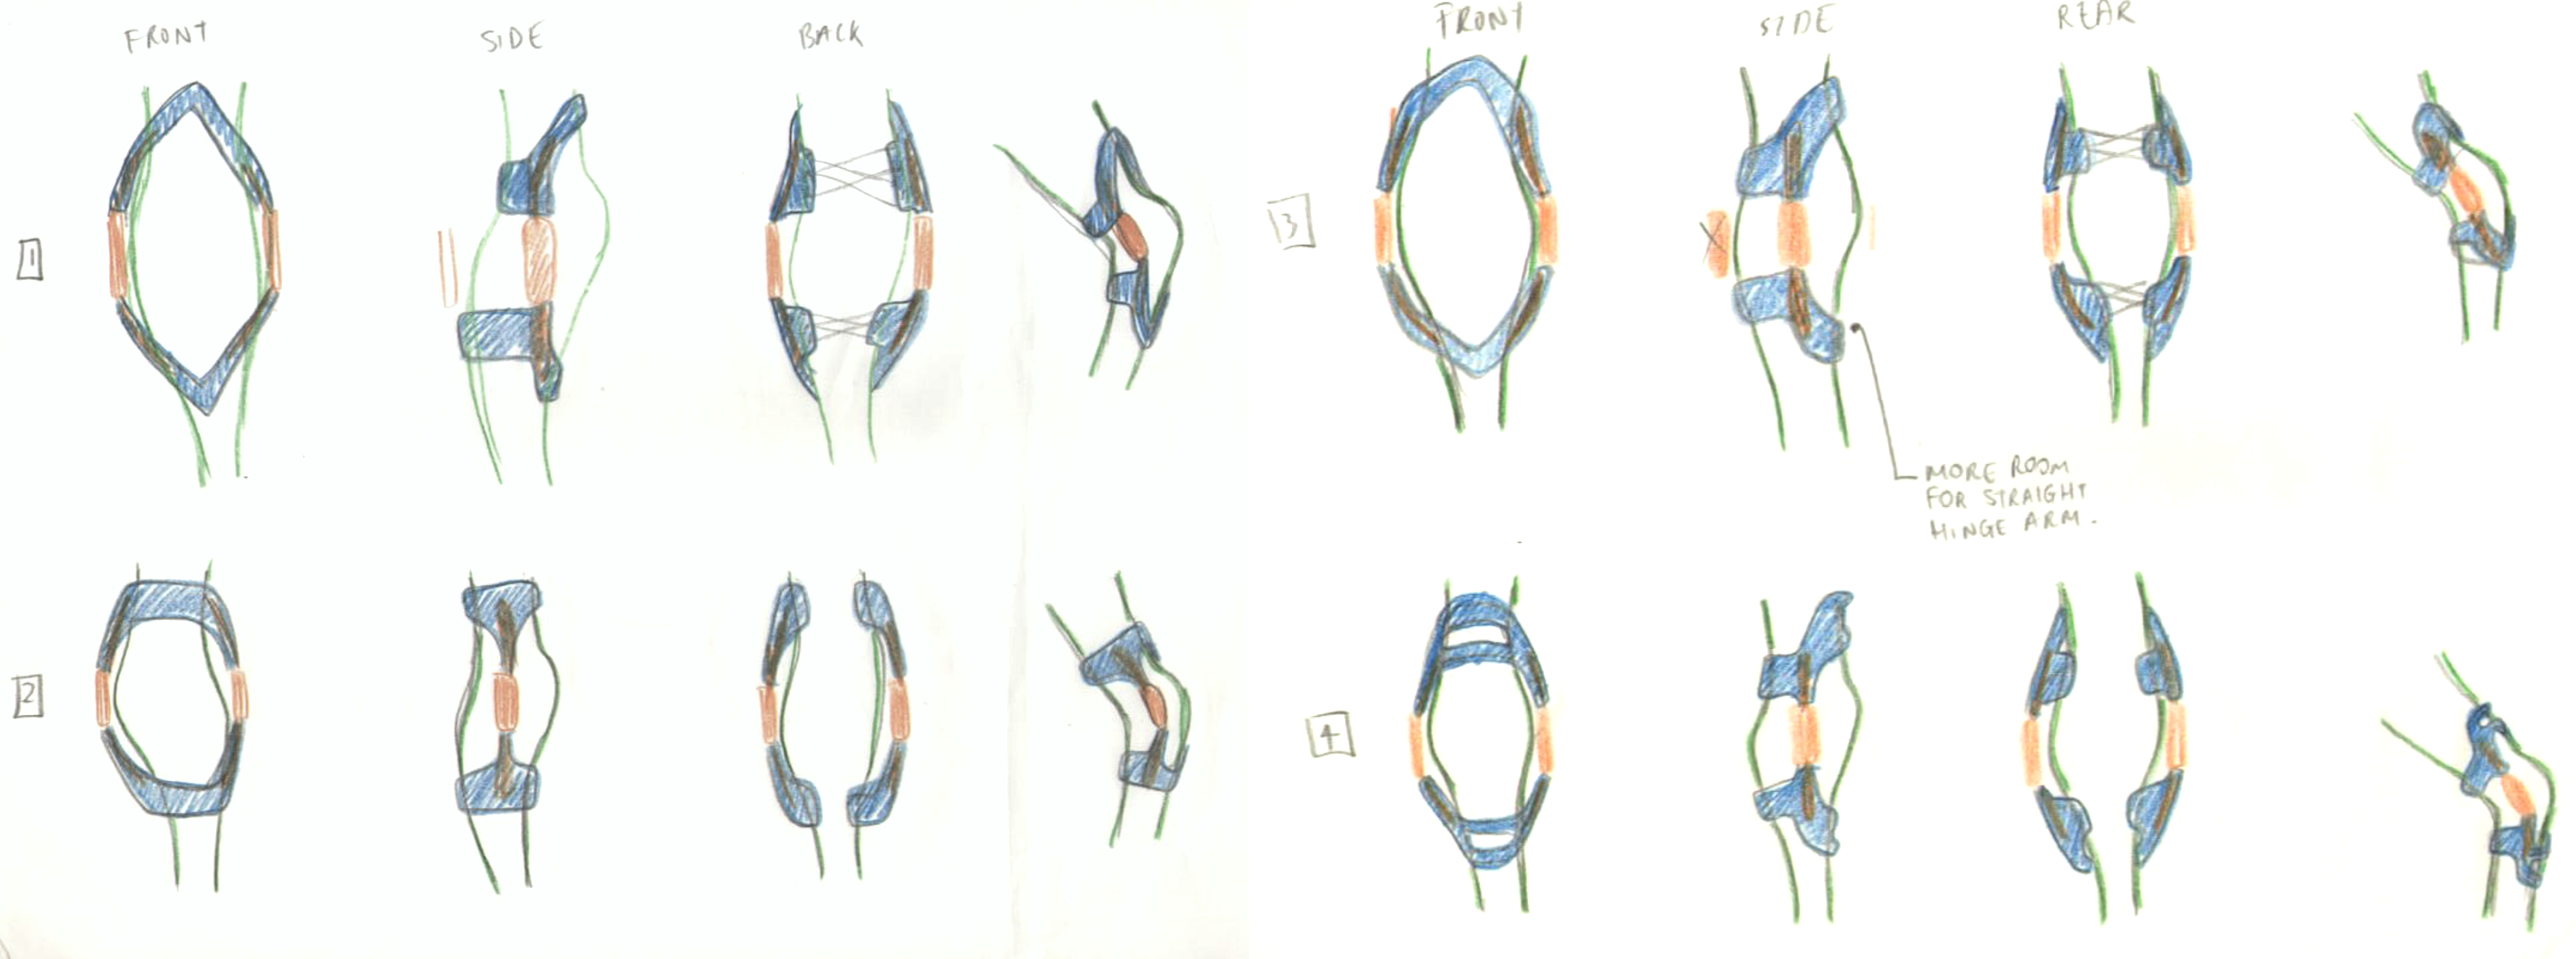
Ultimately, any shape that required the hinge metal to bend sideways rather than up or down was discarded as to not weaken the strength of the metal in the hinge.
Computer Aided Design
The bulk of this project then took place on CAD (Solidworks). Taking the now usable leg scan, I created a digital mould around the leg and began to shape it as required.
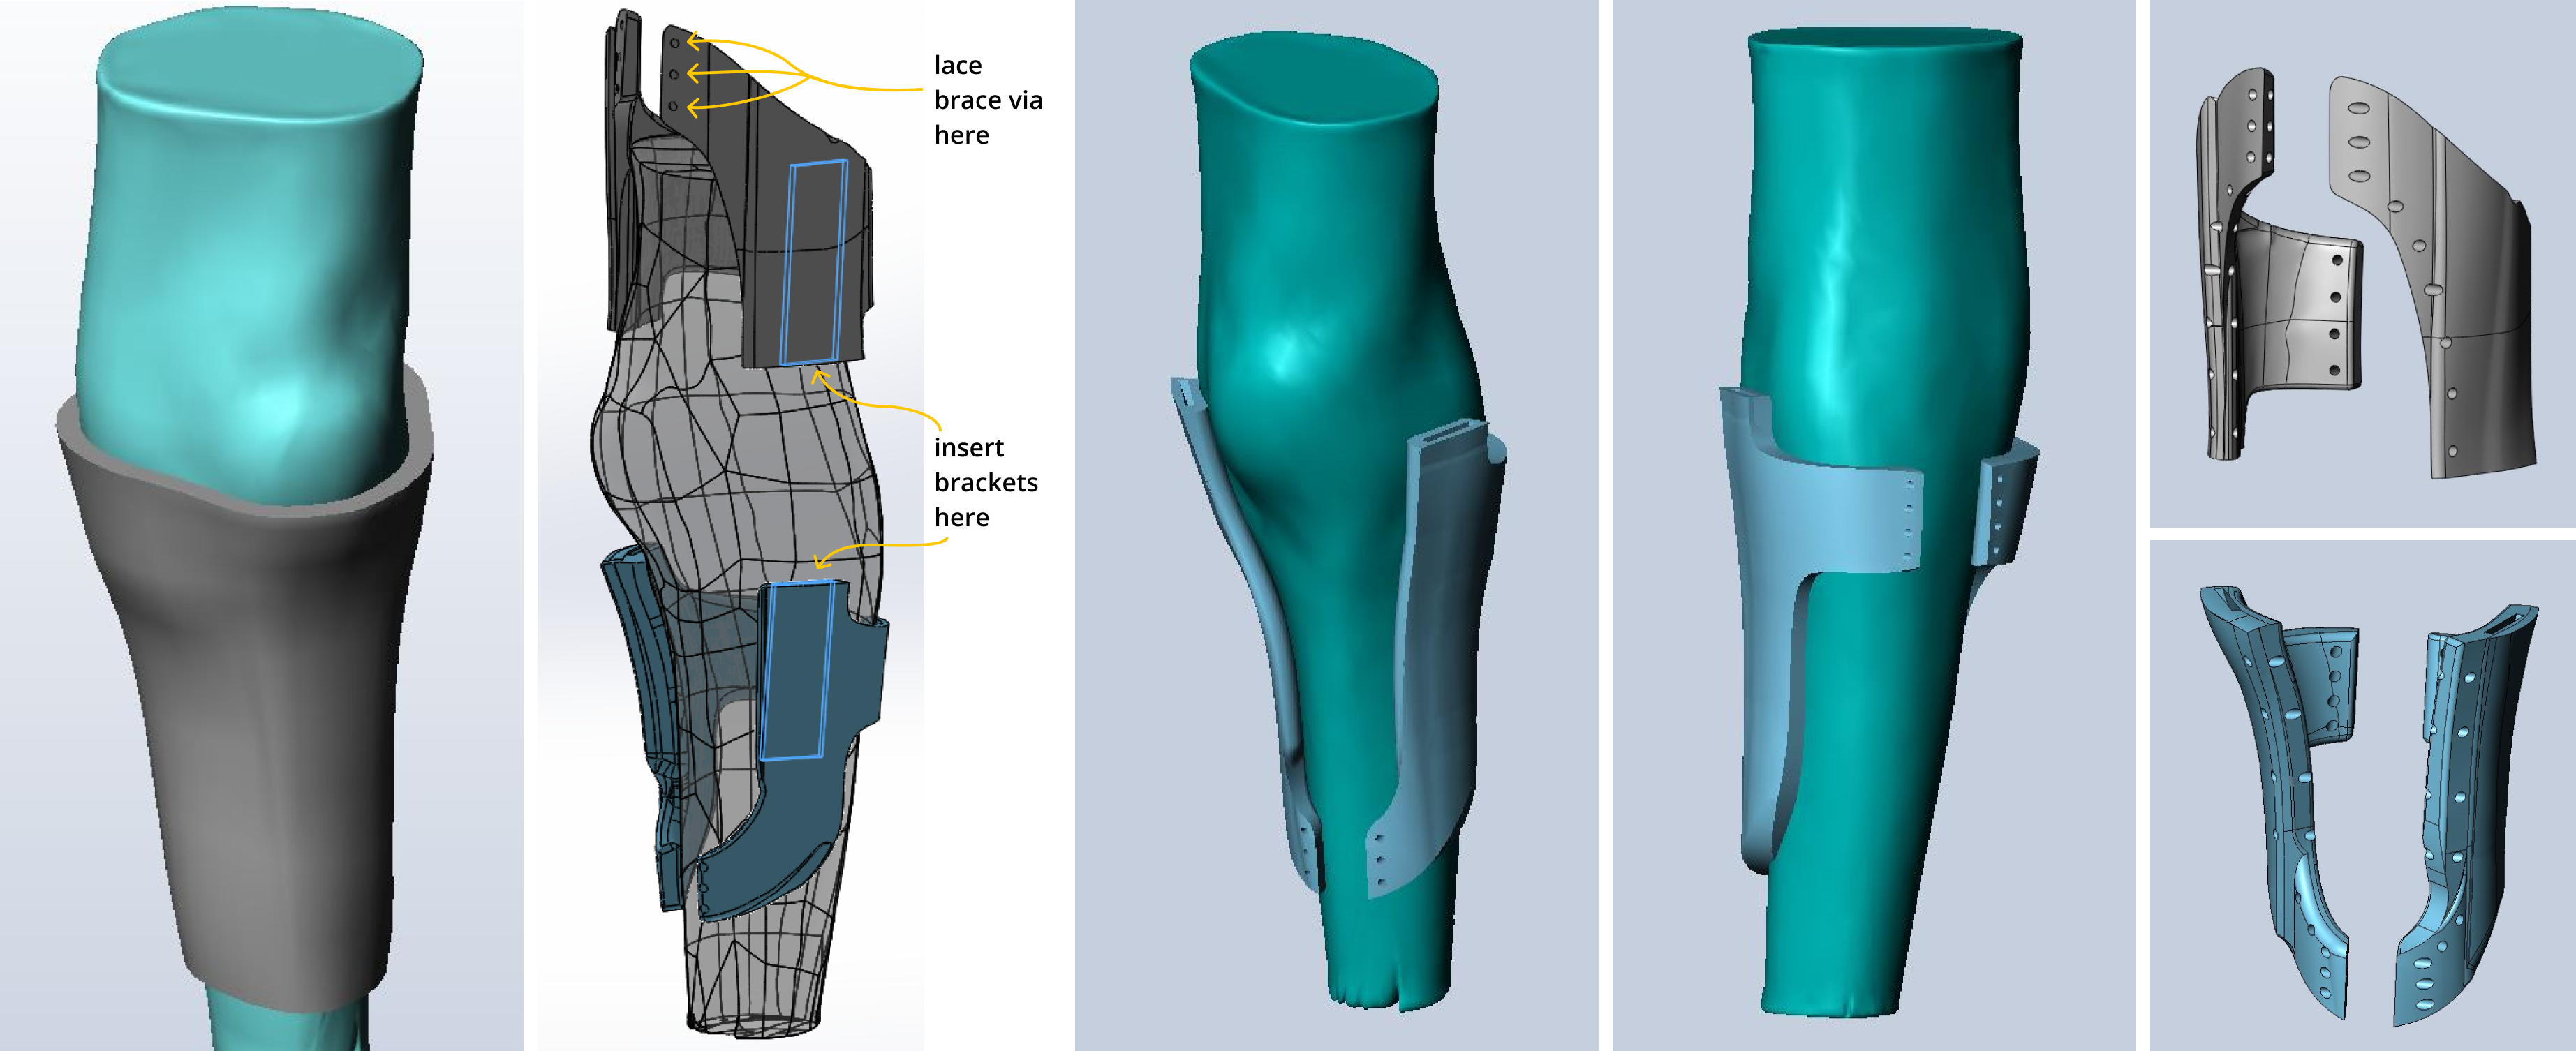
This project undertook many many iterations at a relatively fast pace. Given the parameters of the project, even the smallest adjustment could cause the hinge to get stuck, split the material, or force the fit to shift.
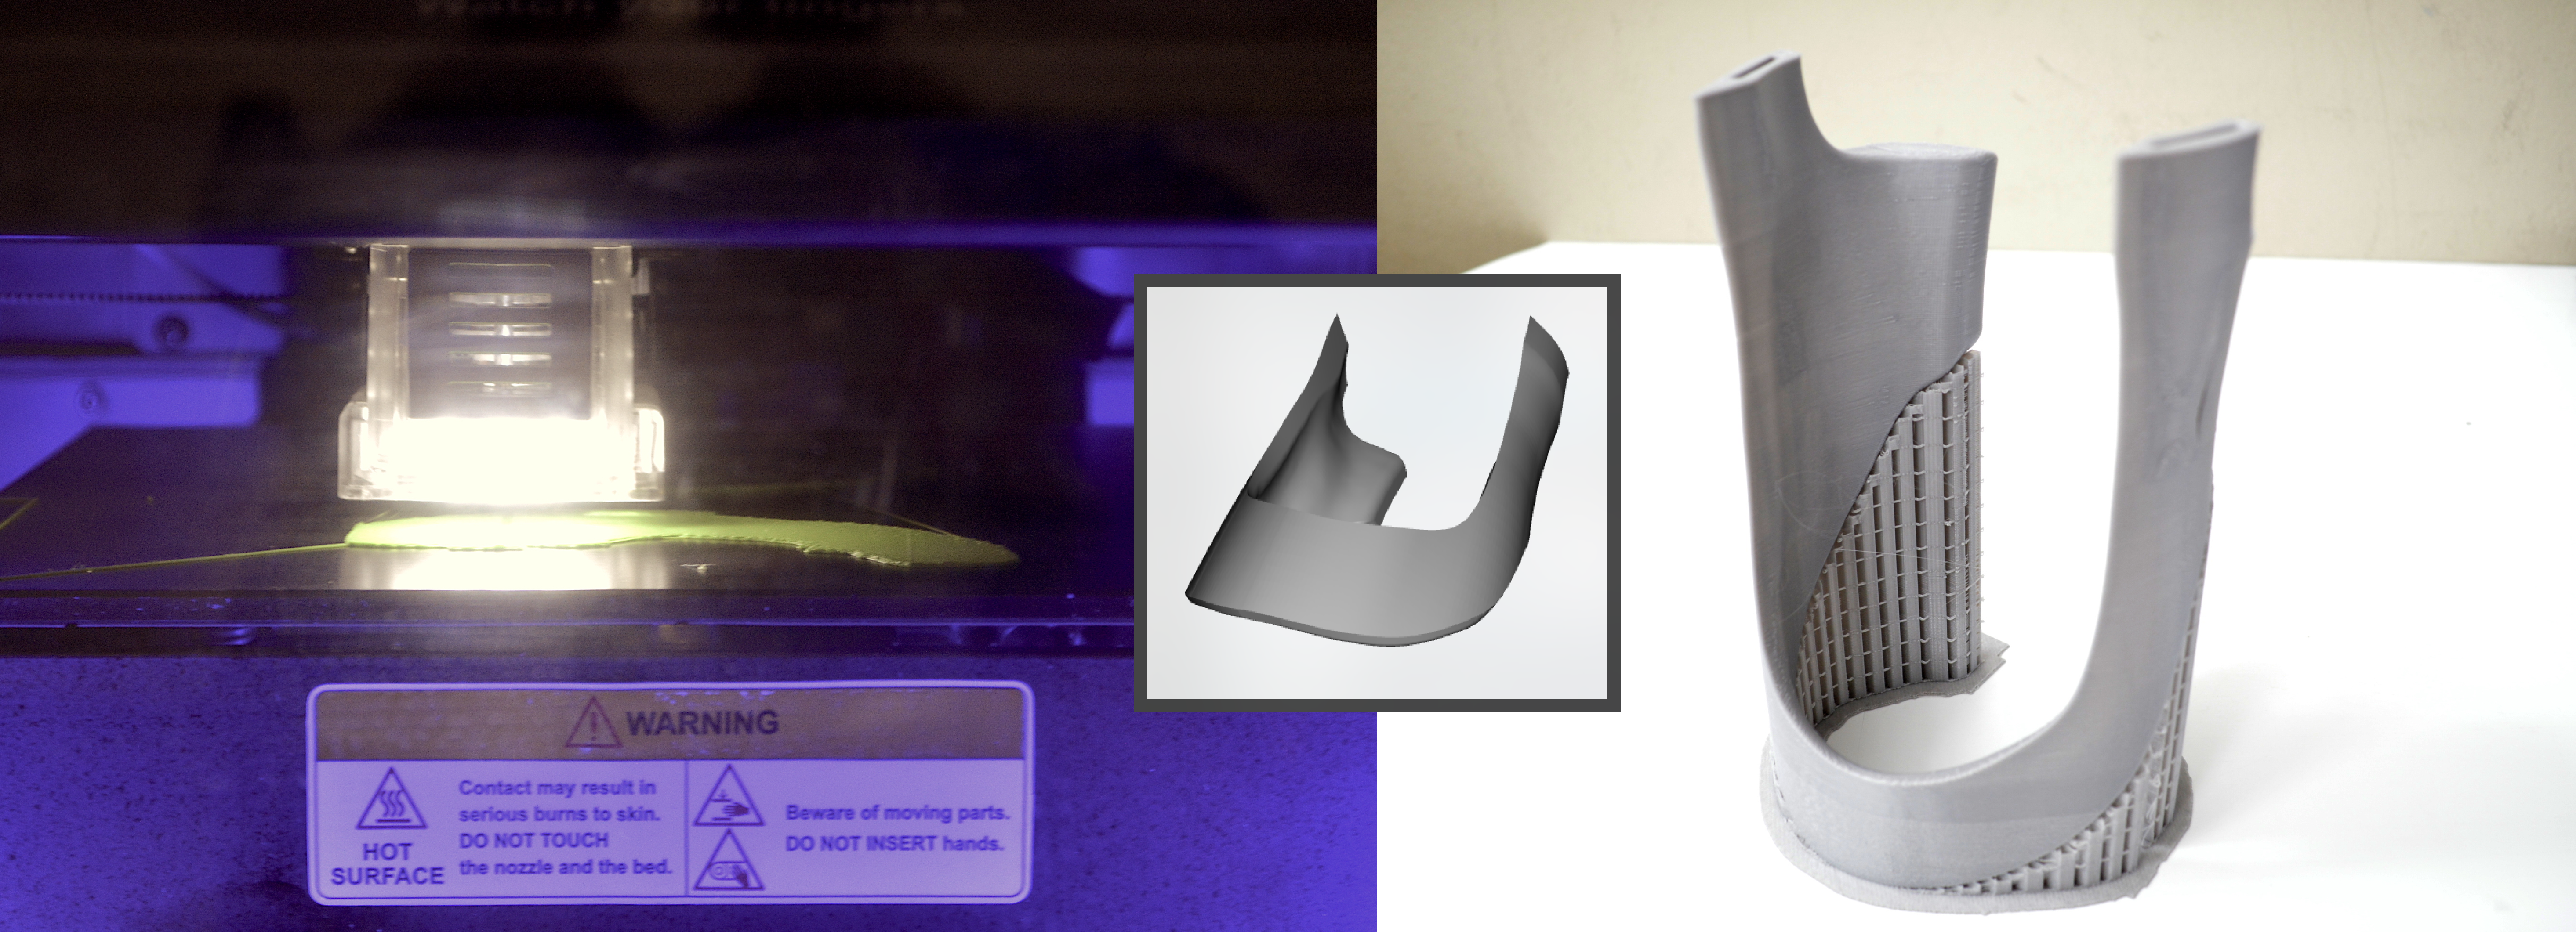
Prototyping
At various intervals, a low-quality prototype would be printed in ABS or PLA as a pulse-check for the project to make sure I was remaining on track. More often than not, just the relevant piece of the prototype would be isolated and printed to save on materials and time.
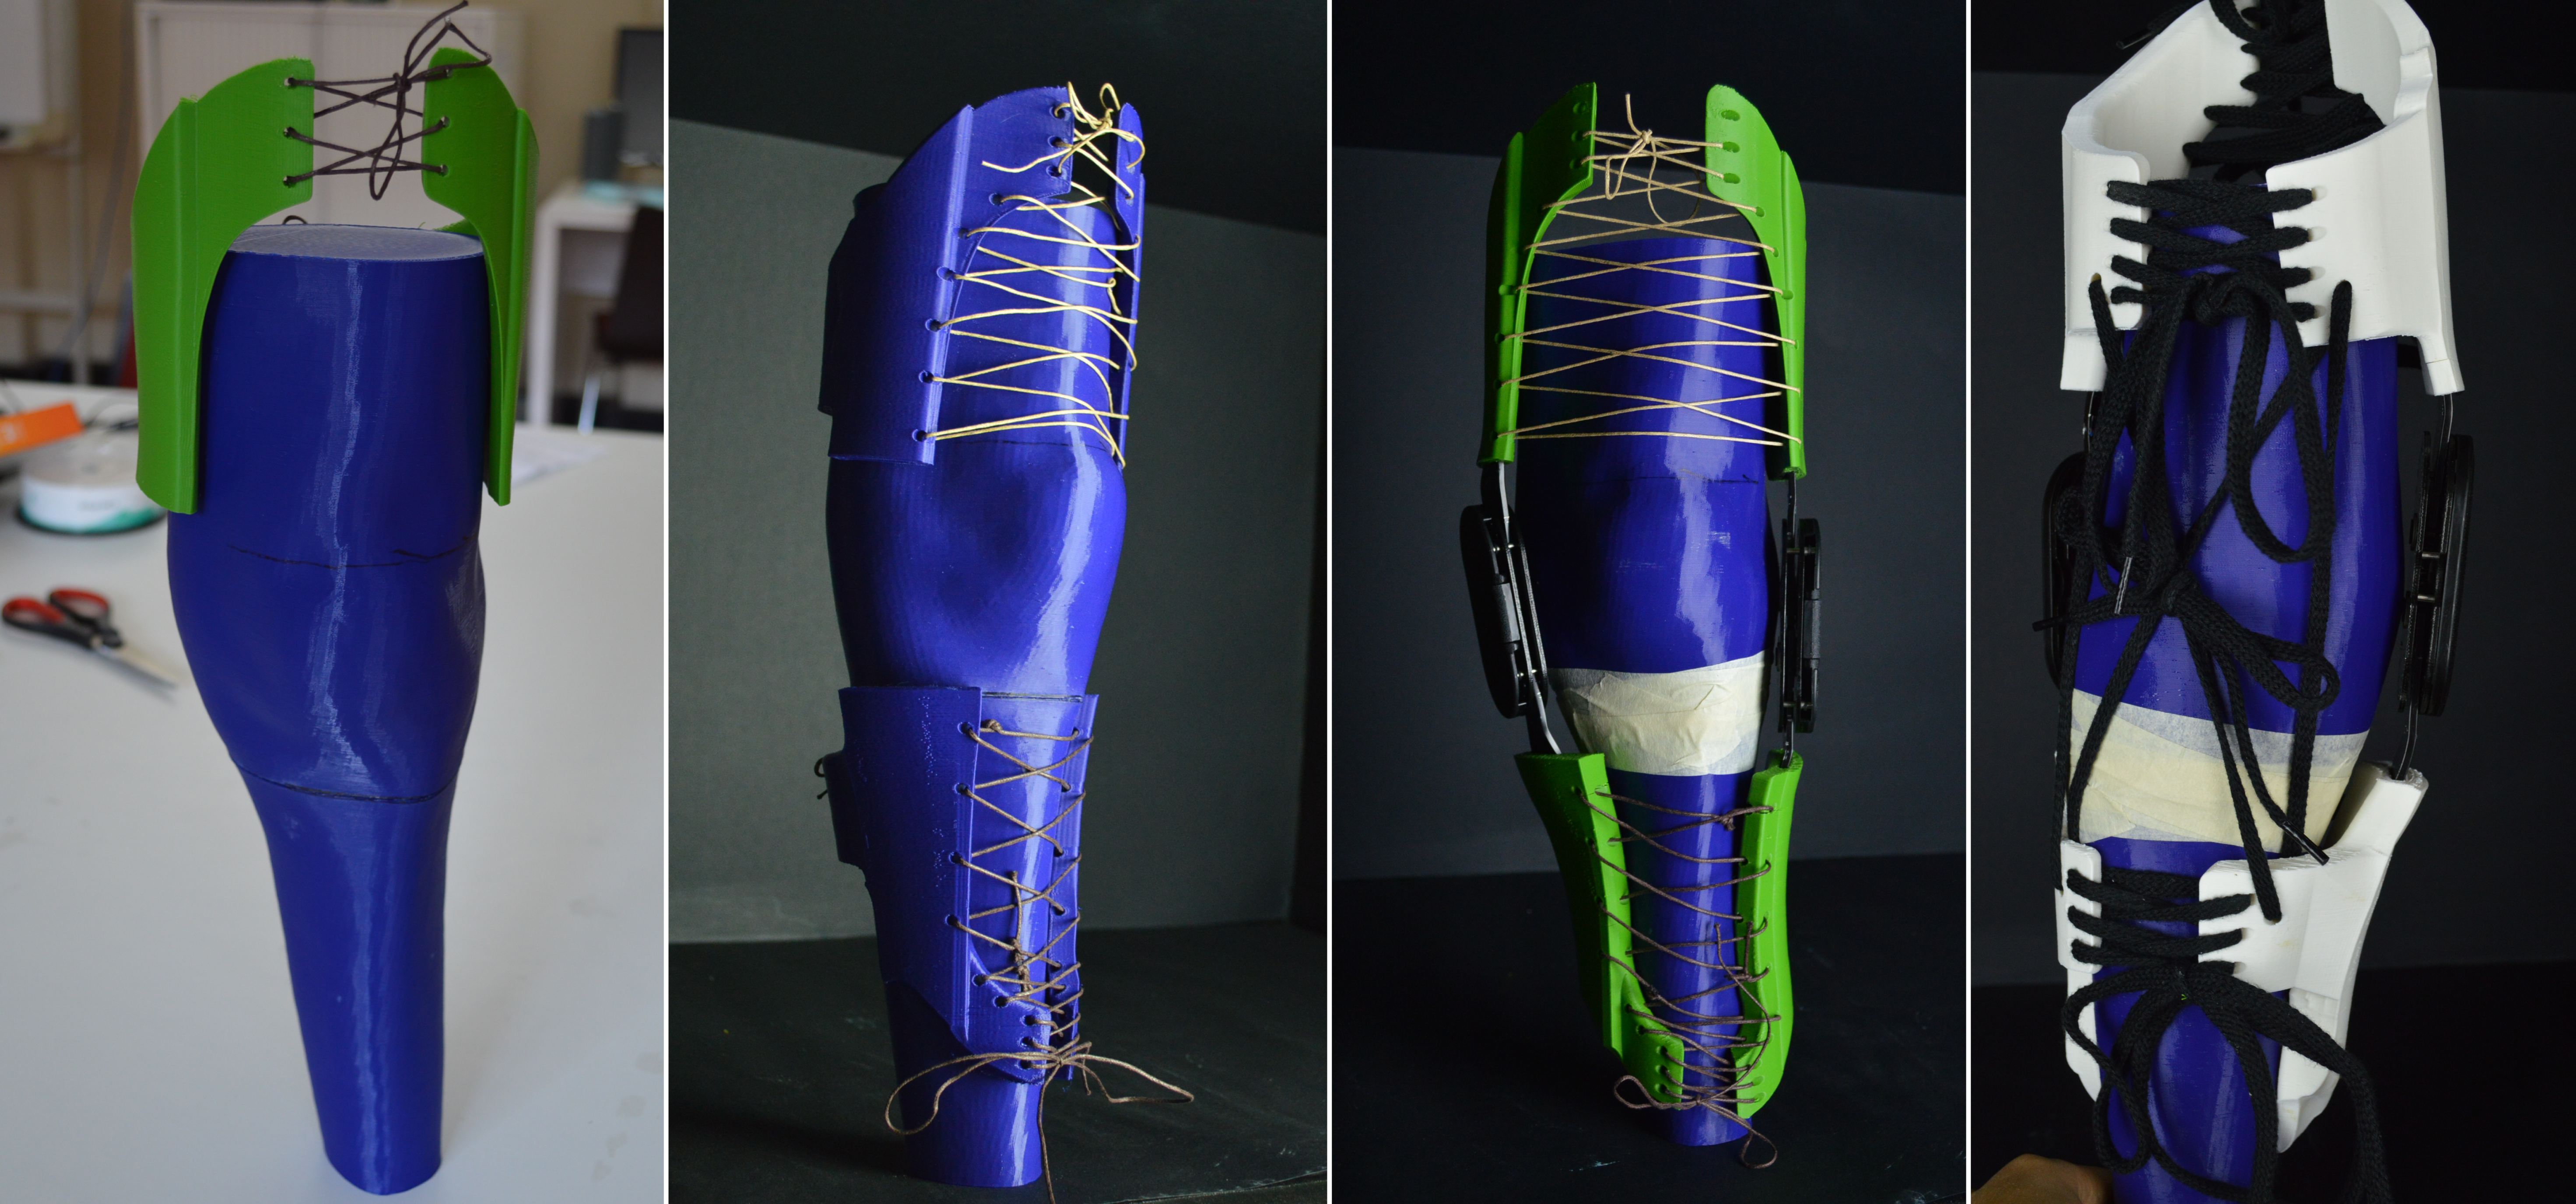
Fit test
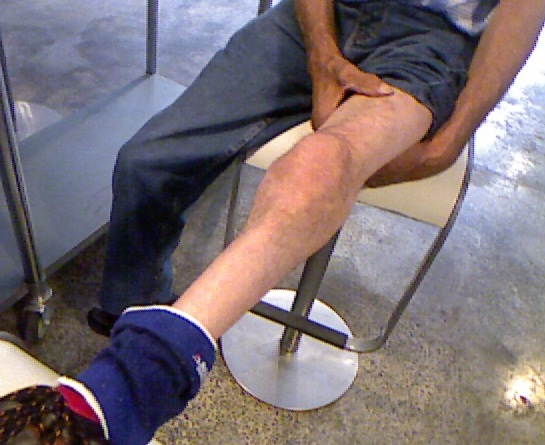
Throughout the process, email communication was maintained with the client and towards the end of the project, he also came in for a physical test of the second-to last prototypes. This session was used to measure for any finishing pieces (such as textiles for a cushioning layer), and ensure that the piece would fit on the moving leg rather than just the static one in the studio.
After one more round of adjustments and finishing, we were ready to print and assemble the final product.
Outcomes
The final product involved 4 printed pieces, neoprene for cushioning, cotton laces and of course, the metal hinge. Once the pieces were fit onto the leg, and laced to fit, taking the brace on and off was as complex as tying a shoelace.
The hinge was set to just below 180º so there was no chance of full extension let alone hyperextension, but the client was still able to walk.